

Part 2
Hey there. After the moderate acclaim of my last bike videos (tens of views!), I figured I’d double down on that success and make another. This one documents my budget-conscious descent into gravel bike conversion, complete with mistakes, surprises, and a whole lot of sanding.
The Problem
I started out happy with two great bikes and one sentimental one. So, naturally, I decided I needed another. The kind of bike the internet gently pressures you into getting; a gravel bike. The ‘blender’ of bikes. The last bike you’ll ever need. Or so they say.
But gravel bikes are expensive, and with most of my income going to replace electronics my kids have destroyed, a shiny new Canyon was out of reach. Then I discovered the world of MTB-to-gravel conversions. Old frame, new parts, low budget, no experience. This was going to go so well.
The Build Begins
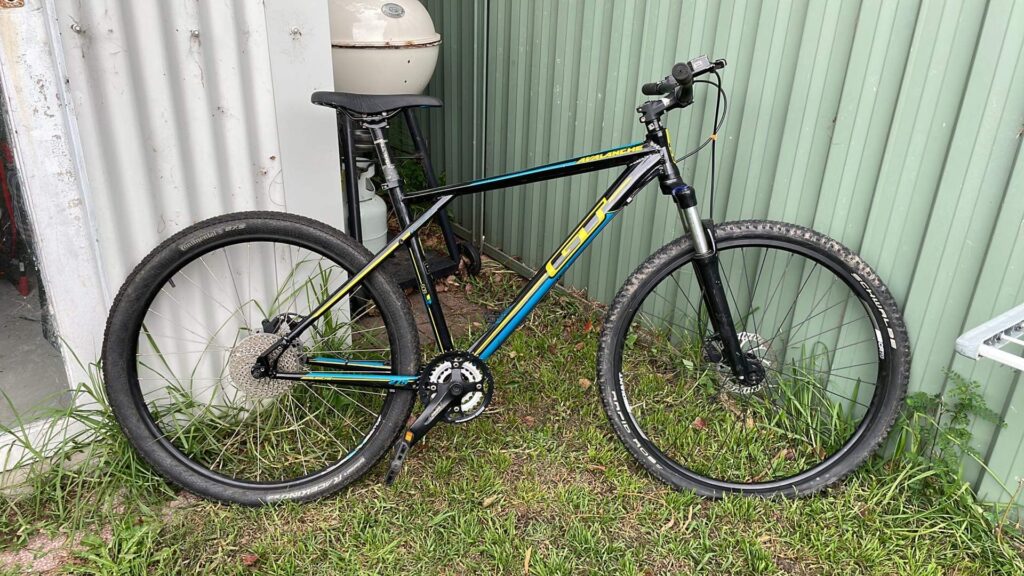
I picked up a 2000s-era GT Avalanche for $200.
The reason for this frame was basically geometry and price. I wanted a relatively level cross bar so that the ride would be as similar to a roady as possible.
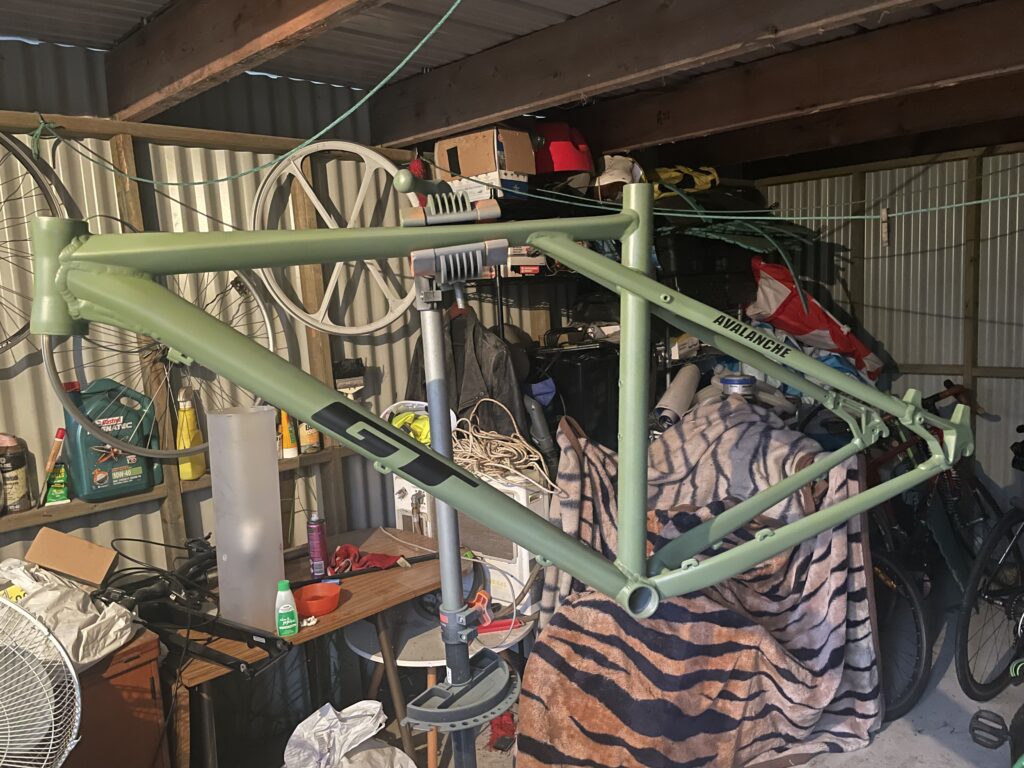
The paint job was a war crime, think 1985 X-Men tights. So I decided to strip and respray it myself. I’d never painted before, but how hard could it be?
Turns out: quite hard.
I filmed the full teardown to help me rebuild it later, then accidentally deleted the files off the card. Excellent. So this video picks up mid-project, after we’ve already pulled off the parts.
But long story short, the bottom bracket had fused into the frame, and had to be sawed off by a bike shop. A scar remains to this day.
Stripping and Sanding
First came paint stripping, which was straightforward but surprisingly toxic. Even outdoors, I was clearing mucus for days. Next was sanding. Endless sanding. I roped in my kid with promises of Minecraft in exchange for elbow grease.
Then came the etch primer. It looked okay, but humidity, bugs, and one very determined moth made it a slow and frustrating process. Some panels bubbled. Others dripped. Rain didn’t help.
I used Spray.Bike paint over the primer — a self-etching powder coat style paint meant for bikes. Unfortunately, I sprayed in direct sun. Bad idea. The paint dried mid-air, hit the frame as powder, and created a horrible sandy texture. The entire can was wasted.
Painting Lessons Learned
- Do not spray in direct sun.
- Do not spray in wind.
- Mind your distance. Spray.Bike wants 10cm. Regular cans want 20cm.
After sanding everything back (again), I gave up on Spray.Bike and bought standard rattle cans from Bunnings. Indoors, with a mask, this worked much better.
The Clear Coat & Decals
I then used Spray.Bike’s matte clear coat, which actually helped. It even warmed up the tone of the too-cool base coat. It dripped a lot but sanded easily. I added some simple decals for a minimal look.
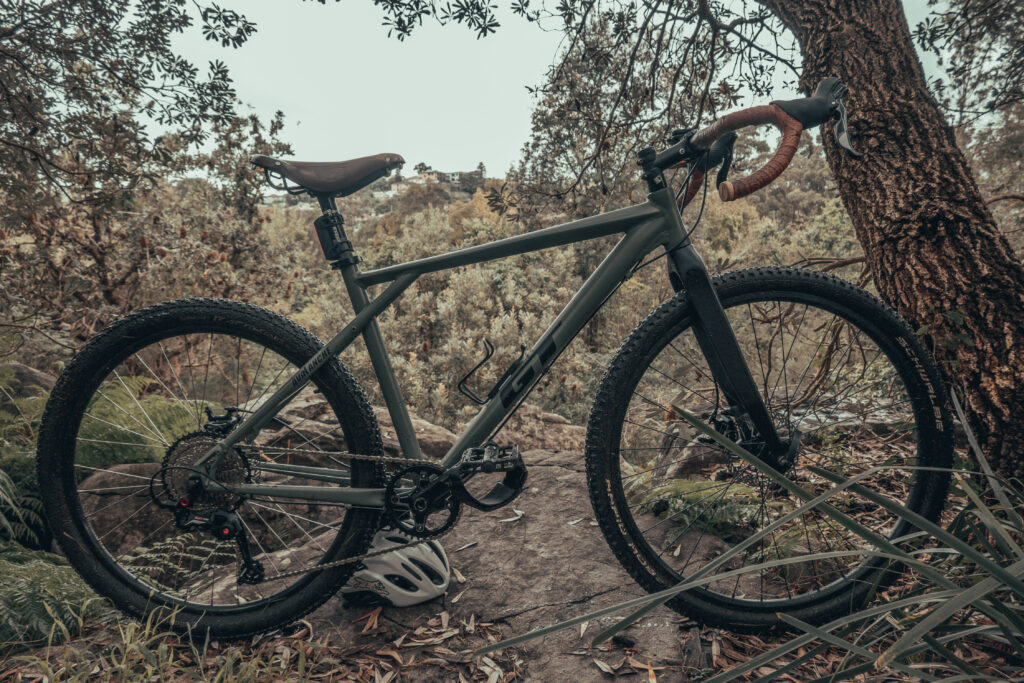
Bike Assembly
The fork was upgraded to an ali express carbon fork, lighter than the original steel. I miscalculated the stack, didn’t know what a cap extender was, and guessed the compressed fork length. Still, I think geometry ended up fine.
For cranks, I used a BSA bottom bracket and SRAM-style cranks. I learned the hard way that unnecessary spacers can ruin crank clearance.
The group set was a Sensor SRX Pro — an affordable, Chinese SRAM-style 1×11 option. It worked out of the box. Impressive. Cable-operated hydraulic brakes were included, but didn’t fit — another month-long wait from AliExpress.
The cassette is a 46T Domino’s-pizza-sized monster. Cabling was surprisingly simple with cheap eBay housing.
The Budget
- Total: $1,073.50
- Minus parts sold: $180
- Final cost: $890.50
Not bad for a nearly custom gravel bike under $1K AUD.
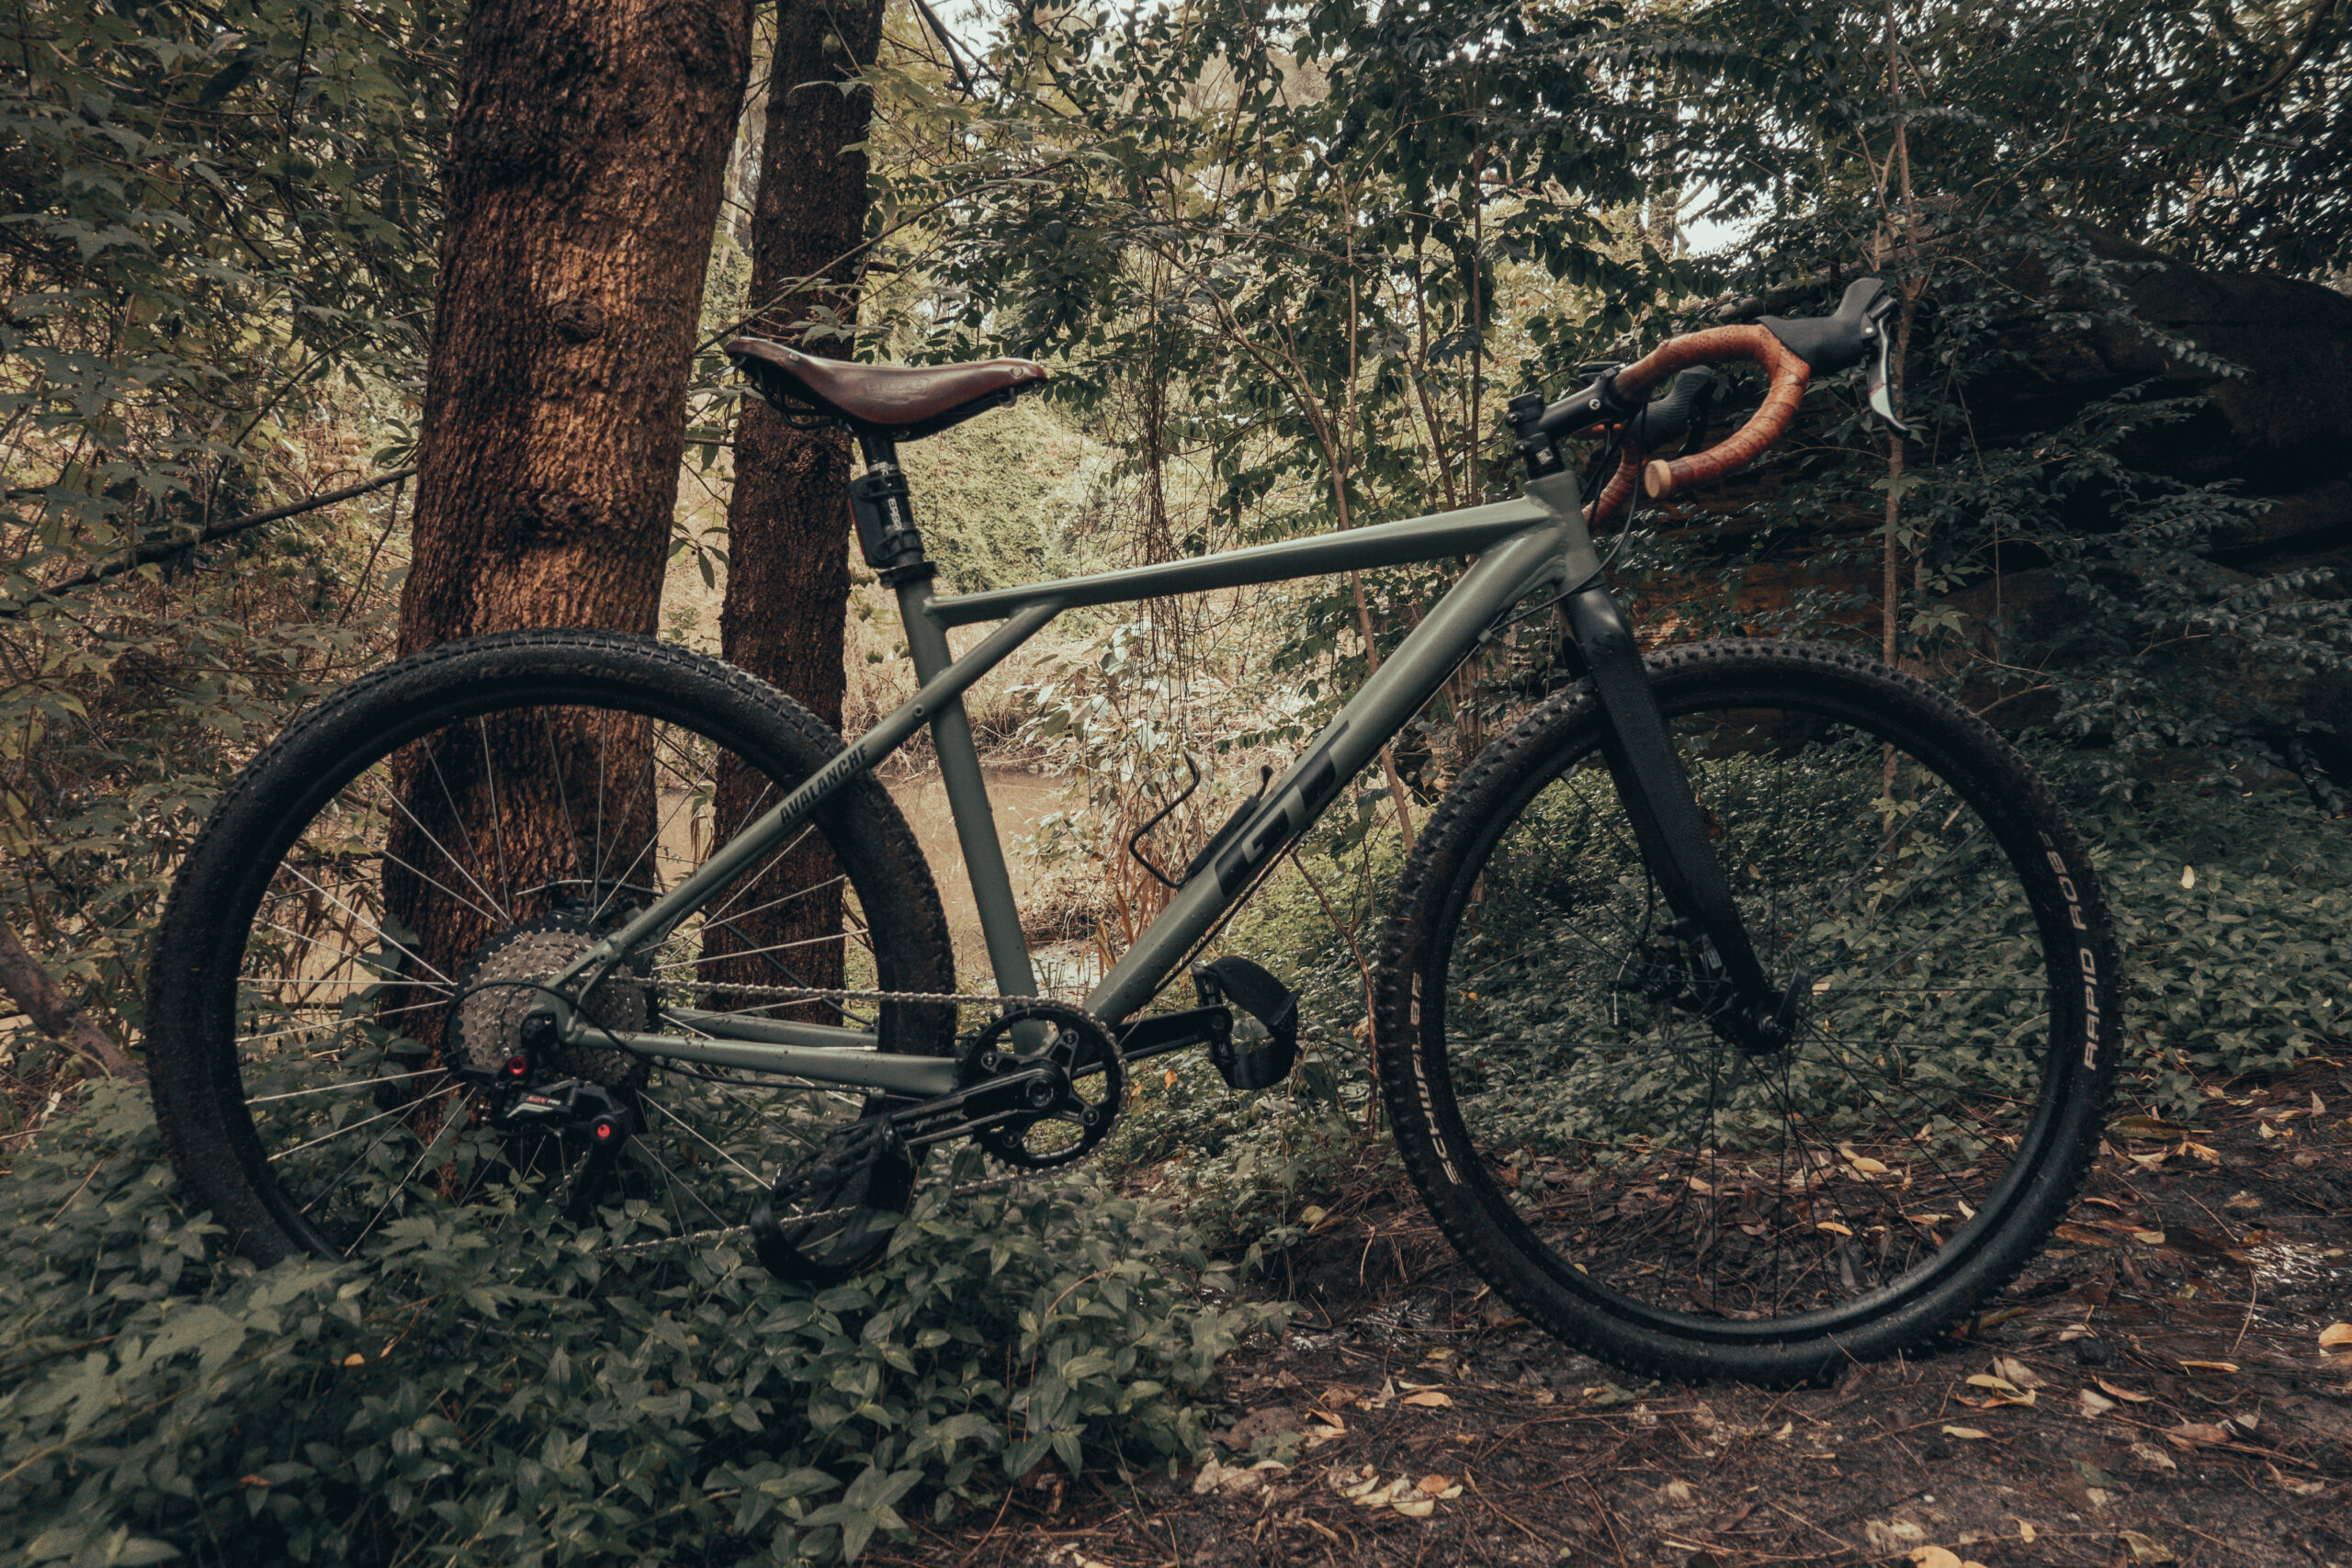
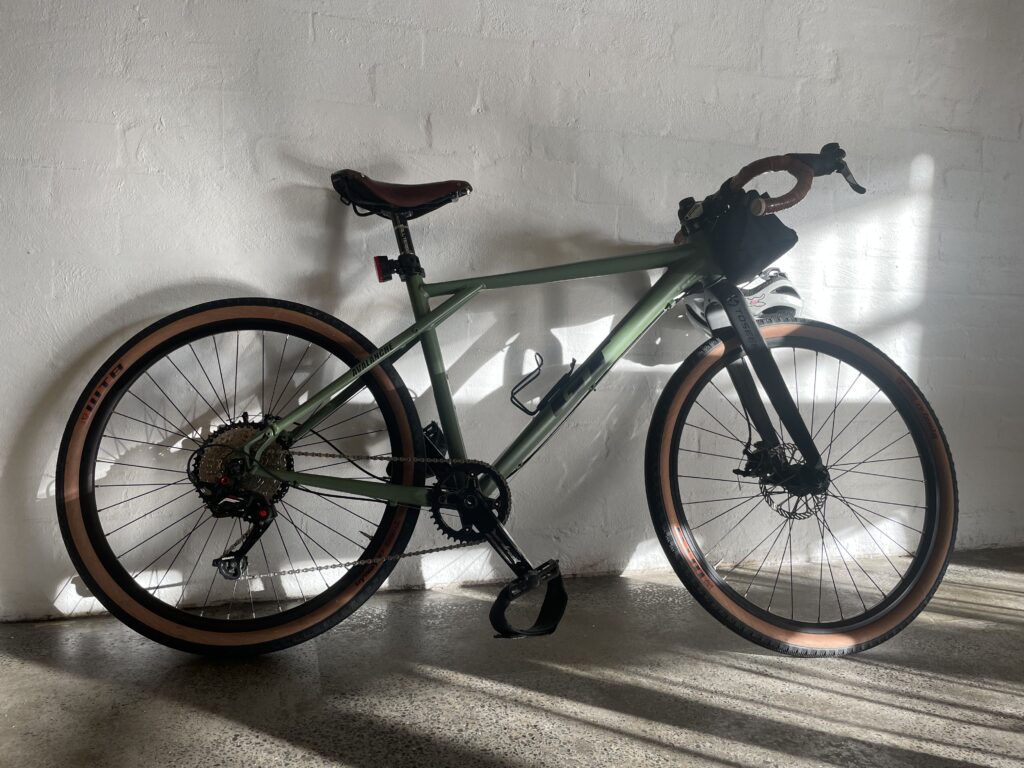
Final Form (6 Months Later)
Since that first ride, I’ve swapped out the mismatched mullet wheels for matching 650b WTB 47mm tires, they have knobby edges and slick center. Good commuter rubber.
I added cheap flat pedals with diagonal straps so I can ride in regular shoes, plus a rear rack for upcoming bikepacking adventures.
A stubby 30mm stem replaced the 80mm one for better fit. The steering is definitely a little twitchy now, but the wide tyres balance it out.
The drivetrain needs regular tweaking, it’s not as smooth as Shimano 105, but I love the simplicity of 1x. Gearing is mostly fine; occasionally I wish for a touch more top-end.
Weight: around 12kg. Heavier than my old steel roadie, but with way more grip and a far smoother ride.
Conclusion
This project was messy, sweaty, sometimes frustrating, but worth it. I learned to paint (badly), build (clumsily), and ride (happily). And most importantly, I built a capable, unique gravel bike for under a grand.
Next up: bikepacking. Stay tuned.